Showing posts with label crafts. Show all posts

August 5, 2012

Its an Olympic Summer!

 The Olympics this summer have been providing a great sense of direction for the kids and I over the last two weeks.  Sometimes I get to the middle of the summer, and I think, "Yikes!  What are we going to do now???"  Maybe its the age of my kids this summer, and how much more capable Roscoe is or something, but I've hardly thought that!  We've been going to the beach a lot, and had family visiting, and so much more.  All the same, I love working within a theme, my kids love having a craft to look forward to every couple of days, and the honest truth?  I just need an excuse to start another Pinterest board (check out my Olympics Kid Fun Pinterest board)!!!
 So, last week we did a great painting activity using toilet paper tubes to paint the Olympic rings.  Have to say, pretty low mess, and easy clean up (I threw the tubes away... no washing brushes!).
 As we painted I talked to the kids about how everything always points back to Jesus' love for us: nature, the seasons, the Olympic rings...
BLACK reminds us of our sin, all the bad stuff we do, say or think.
RED is for the incredible LOVE that Jesus has for us, and because he loves us, he died for us, shedding his blood and taking our punishment, 
that we deserve for our sins.  
He loves us that much!
WHITE is for forgiveness.  For saying that we're sorry to God and others for our bad choices, and having our sins cleaned off us, forever!
GREEN is for new life, for the new, fresh start we get to have 
because of being forgiven: freedom!
YELLOW is the hope that we have of spending the rest of our lives 
with our true best friend, Jesus, every day.
BLUE is for telling others about Jesus and his love.  
One way we can do this is through baptism, 
as well as through our kind words, kind hands (actions) and kind thoughts.

 On another day we were watching tennis with the kids, and thanks to my Pinterest board, I had organized several crafts ahead of time for us to do, and pulled out this beauty!
 Little Tennis Puppets!  Aren't they cute?  We used supplies that I had around the house: pompoms, googly eyes, and feathers.  The kids had fun picking out the colours and then I glue-gunned them on to the balls.  
The puppets are great for storing treasure in too!
We've also built different models of boats to test which ones float the best, but were too busy having fun to take pictures!  Here are some of the ideas we used from other blogs:

January 15, 2012

We're Going to Disney World!!!

That's right!  We're heading to Disney World!  The last week of countdown is on and we are all super excited for this grand adventure!  We've been planning this trip since the summer, and now it is less than a week away!  We kept it a secret from the kids until Christmas, and had them do a big scavenger hunt to discover what their surprise present was.  

Here's what we did:
Being that I have a 5 and a 3 year old, reading is definitely not their forte.
So, I had to come up with a way that they could figure out the message 
without us actually saying it to them...
I took several pictures of things from around our home that spelled out a secret message.  
Then placed a picture at each clue that would lead them to the next clue, 
ending with them returning to the living room, where they would put all the clues into order 
(I numbered them on the back, so they put them in order by number and then flipped them over) 
to reveal the message!

Here's the clues:
The Wii from the living room... 
A picture in Aria's room...
A page from a book (a helicopter was the closest thing I could find to an airplane in our house!)...
The clock in the kitchen...
The "C" from Roscoe's name in his room...
The Mickey ornament that I made (but no one could figure out that it was Mickey's torso.  
I think its cute, and I found the idea here)...
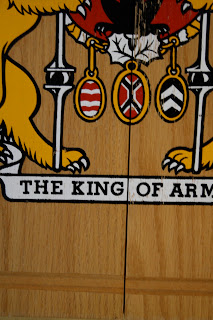
I circled the "in" from King on Jer's dart board in the basement 
(Aria figured it out way faster than I thought she would)...
The calender flipped to January that I staged in the kitchen...
I'm not sure who was more excited: 
the kids or the crowd of family and friends 
running around the house chasing them as they solved the puzzles!  
It worked out so well.  
I'm still waiting for the video footage from a couple of the "aunties", so I'll post that later!
  
It was funny, because after they solved the puzzle, I don't know if Aria totally "got it".  
I mean it is a pretty crazy concept to think that we'll be traveling all the way 
down to Orlando to hang out at WDW for a week!  
And with Grandma and Papa, the cousins and their parents!

After the kids solved the puzzle there were some surprise gifts under the tree.  
We had bought a Mickey and Minny stuffy for each of the kids, 
and I had made a countdown calendar, and an "I Spy" game for the trip.  
The countdown calendar has brought me much sanity, because I was tired of counting everyday to answer the question of "how many days until Christmas?".  
And this has made it so that Aria can always see how many days are left!

I had made some travel "I Spy" games for Aria and Roscoe, 
but I also made some for their two cousins that are coming on the trip.  
Before Christmas, when we were putting together the package to send to the cousins,  
I had to explain that the cousins were going to WDW in January.  
And Aria said "Oh, that's nice.  Some day we'll go when we're older."  
And I was thinking "Yeah, like a only a month older!"  
Aria and Roscoe are VERY excited to see their cousins.

I knew the reality of the trip had settled in on Aria when she came to me later on Christmas day and said, "Mommy.  This is the BEST gift you and Daddy have EVER given us!"  And she was a little choked up, which made me a little choked up!

So that's it!  The count down is almost over!
Check out my Disney Trip Pinterest Board for more ideas!

December 18, 2011

End of November Already? E-book review of "Truth in the Tinsel"

It was my birthday on Wednesday, and one of the things I love about having a birthday at the end of November is that as soon as its done, I feel as though I have permission to start celebrating the Christmas season!  Now, I'm not a fake tree person, so I always wait a bit before I set up the tree and decorate it (otherwise it would be drier than the Okanagan in August by the time Christmas day actually comes around), but I do like to bust out the Christmas music, the Christmas baking and the Christmas boxes full of Christmas decor.  

This year I'm most excited about celebrating the advent season with my family.  I have very vivid and fond memories of exploring the season of advent with my family.  My mom, especially, always tried to help us stay focused on the birth of Jesus, Emmanuel, God with us, rather than on the presents and festivities and programs.  One of the best resources my mom used to guide our times in exploring the true story of Christmas was a book from Focus on the Family (I'll include the title of this later, if I can figure it out!).

Buy Truth in the Tinsel here!
This year I'm really excited to use a resource that's brand new, an e-book by a bloggy friend from Atlanta, Amanda White called "Truth in the Tinsel".  First of all, can I say how much I love the title and design of the book?!!  I've never, ever read an e-book before, let alone reviewed one on my blog, and I can't be more thrilled than to share this book with you!  

In Amanda's own words, "This is an adventure for families to learn the story together. It’s an experience with the greatest story every written and the greatest gift ever given—God’s own Son, Jesus the Christ!"  This e-book guides families with preschool through early elementary aged children through the use of a "traditional" advent calendar.   
BUT... instead of getting a chocolate everyday (as if my kids need more candy!), they receive a clue,  
which leads them to the Bible, 
which leads them to creating a craft that highlights a truth about Christmas, 
which leads them to discovering the miracle of 
Jesus being born as a baby,  
which leads them to hearing about 
just how much  
God loves them! 
 
In the e-book Amanda lays everything out in a simple and accessible way from supply lists (based on supplies that most families already have laying around their homes), to abbreviated plans for busy families, to templates, discussion guides, extra activities and step by step instructions on how to create each ornament.  And I have to say, in looking through each day and what ornaments Amanda has suggested doing, I am super excited about some of them, as they are projects that were on my to-craft list for my kids and I!

Best of all, "Truth in the Tinsel" is only $4.99! 
Less than you'd spend on a grande white peppermint mocha, or a box of Christmas oranges!
Plus, if you purchase it on November 25, its only $2.99.

The little Baby is no longer in the manger but alive and sitting on a throne—waiting to have a relationship with you and your children. Help your children get to know Him this Christmas!  Amanda White, Truth in the Tinsel

........
This post has an affiliate link.  Thanks for supporting my blog!

July 3, 2011

Fingerprint Art

Aria had a friend over the other day, and after playing outside for a while and having eaten lunch, we thought it would be fun to try some fingerprint pictures with a great Melissa and Doug ink pad I picked up at the Vernon Teach and Learn.  First we carefully got our fingers inked.
 
Then we stamped them on the paper.

 Then we did some drawing and coloring to change the little fingerprint ovals into something!  It was funny to see how the girls would copy whatever picture I had just created.  Roscoe had a hard time not transferring one color of ink onto another.
 Both girls are very artistic, and really enjoyed using their creativity.  I think their pictures will make great birthday cards!  We even made some Get Well Soon cards for Aria's friend's little brother who was recovering from an operation.
So simple, and easy to clean up... just wipe little fingers clean!  And a great way to use both fine and gross motor skills.  Cheers!

April 13, 2011

Blossoming Mother's Day Cards

I'm a little early, I know.  But, I'm heading out at the end of April for a week to Atlanta for the Orange Conference... and I've been really bad lately with birthday, Christmas and Thank You cards!  This way, I can pop the cards into the mail when I get home and voila!  I'm somewhat prepared!

I say this every season, but I really think that this is my favorite time of year.  I'm so blessed to live in a part of the country that experiences distinct seasons, and weather that is, for the most part, appropriate to the season!  Right now the forsythia bushes are just starting to explode with vibrant yellow, and I'm looking forward to the double flowering Plum shrub that the kids bought me for Mother's Day two years ago to actually flower this year (I can see the buds, I KNOW its going to be beautiful!).  And, we didn't massacre our Cherry tree this year with the pruning like we did last year, so that promises to be a thing of beauty as well this year.  And maybe it will yield more than just one cherry later on as well! 

So, to celebrate spring blossoms, and the upcoming Mother's Day, the kids and I worked on some cards and pictures today.  They were super easy!  I followed the tutorial by Pink and Green Mama.  She has at least 1000 different art activities that I want to try with the kids.  I have to admit that although we enjoy creating, I often lack the energy to be creative enough to come up with our own activities.  But I'm not beyond confessing that I seek inspiration from other moms who are doing amazing activities with their children.  In fact, I'm becoming somewhat addicted to mommy blogs, and their creativity.

What I loved about this craft, is that it stirred up memories of art classes from elementary school days gone by.  It was okay to get a little messy, but easy to clean up.  Even my 2 year old boy enjoyed it... for four minutes or so.  He really liked blowing the watercolor branches out with a straw.  He put a lot of himself into the pictures... mostly his drool, but he had fun.  Aria loved choosing which colors to use for the blossoms, and enjoyed squeezing out more glue onto the plastic lid.


April 5, 2011

Fun, Free, Personalized Art

Yes, its true!  I came across a new website today called Wordle.  I had a great time creating some FREE, personalized art for my kids rooms.  The site was super easy to use, and I could choose what layout, colours, and font I liked best.  If you want a certain word to appear larger (like a name), you just have to type it in a couple times.  Here's what I created for my kids.  I'm planning on matting and framing them.

I can think of a million uses for this - especially for scrapbooking!  Or baby gifts! Or birthday cards!  And the best part is that its a fun way to expand your child's vocabulary.  Sit down with them and think up words that remind them of Spring, or to describe their pet, or what their favorite foods are.  The possibilities are endless.

April 15, 2010

Fancy Nancy Party Part 2 - Invitations

Aria loves to do anything crafty, so this year it was really fun to get her to make the invitations.  We went to the dollar store and bought doilies and jewels with stickers on the back (way easier than trying to glue them all individually!), and Aria decorated all the butterflies by herself.   We borrowed the idea from Fancy Nancy herself, from the book "Bonjour Butterfly".

Lately she's been drawing pictures for everyone she knows on post-it notes.  Its really neat to see how she is gaining more control over how she can colour and draw.  She tries REALLY hard to stay in the lines when she is colouring, and when she draws, she tries to draw things (like a smiley face or a pig) instead of just scribbling.  My baby's growing up!  Its crazy to think that in a year and a half she'll be starting kindergarten!  Where has the time gone?

April 2, 2010

Easter Plans

Okay, so I've got some Easter activities planned for Aria and I.  Last year, we started a couple traditions that I'd like to continue this year: decorating hard-boiled eggs (of course), and making resurrection cookies! 

EASTER EGGS
So, for the eggs... I just finished hard-boiling a dozen eggs (good thing we like egg-salad sandwiches, and deviled eggs - if I find the motivation to make them!).  I put them in a pot, covered them with water, stuck them uncovered on the stove, and brought them to a hard boil for one minute.  Then I removed them from the heat, covered them and let them sit for 18 minutes.  After the timer went off, I put them in the sink and ran cold water on them to cool them quickly.  Now I need to stick them in the fridge until we're ready to colour them.

My favorite and I think prettiest way to colour them is with food colouring, oil and vinegar.  Pour some 1 Tbsp vinegar in a bowl, add a splitch (is that a word?) of vegetable oil and a couple drops of food colouring.  Top up the bowls with water.  Make up a couple different colours in a few different bowls.  Then place an egg in a colour, roll it around with a spoon, remove the egg, dry it with a paper towel, and dip it in another colour....  You get this very pretty marbled effect.  The vinegar does the job of setting the colour so that after its dry it shouldn't rub off on your hands.

The other thing I'm going to do with my daughter tomorrow (Saturday) is make resurrection cookies.  This is a really cool way to walk your child through the events of Jesus' journey to the cross and the tomb, so that they can experience it with their senses, and have it explained at a level they can understand.  I struggle with knowing how much to say to my 4 year old about the how and why of Jesus' death and resurrection.  He died because he loves us, but she doesn't even really grasp what death is!  At preschool she's been learning the song "God's not dead", and it is so cool to hear her walking around the house singing "God's not dead, NO! He is alive!"  Yes, he is alive, and that is SO exciting!  He conquered death!  He's bigger than that!  And he chose to humble himself so that he could show me the incredible depth of his love for me.  I am so blessed.

Anyways... the cookie recipe is as follows...

RESURRECTION COOKIES
Read the whole recipe before beginning.  Try to do together Saturday night before Easter Sunday.

You need: wooden spoon, Bible, zipper baggie and tape

Ingredients:
1 cup whole pecans
3 egg whites
1 cup sugar
1 tsp vinegar
Pinch of salt

Preheat oven to 400 degrees.

Place pecans in zipper baggie and let children beat them with the wooden spoon to break into small pieces.
Explain that after Jesus was arrested He was beaten by the Roman soldiers. Read John 19:1-3.

Let each child smell the vinegar. Put 1 tsp. vinegar into mixing bowl.
Explain that when Jesus was thirsty on the cross he was given vinegar to drink. Read John 19:28-30.

Add egg whites to vinegar. Eggs represent life.
Explain that Jesus gave His life to give us life. Read John 10:10-11.

Sprinkle a little salt into each child's hand. Let them taste it and brush the rest into the bowl.
Explain that this represents the salty tears shed by Jesus' followers, and the bitterness of our own sin.
Read Luke 23:27.


So far the ingredients are not very appetizing.
Add 1 c. sugar.
Explain that the sweetest part of the story is that Jesus died because He loves us. He wants us to know this and how to belong to Him. Read Ps. 34:8 and John 3:16.

Beat with a mixer on high speed for 12 to 15 minutes until stiff peaks are formed.
Explain that the color white represents the purity in God's eyes of those whose sins have been cleansed by Jesus. Read Isaiah 1:18 and John 3:1-3.

Fold in broken nuts. Drop by teaspoons onto wax paper covered cookie sheet.
Explain that each mound represents the rocky tomb where Jesus' body was laid. Read Matt. 27:57-60.

Put the cookie sheet in the oven, close the door and turn the oven OFF.
Give each child a piece of tape and seal the oven door.
Explain that Jesus' tomb was sealed. Read Matt.27:65-66.

GO TO BED!
Explain that they may feel sad to leave the cookies in the oven overnight Jesus' followers were in despair when the tomb was sealed. Read John 16:20 and 22.

On Easter morning, open the oven and give everyone a cookie.

Notice the cracked surface and take a bite. The cookies are hollow! On the first Easter Jesus' followers were amazed to find the tomb open and empty! Read Matt. 28:1-9

HE HAS RISEN!  HALLELUJAH!

December 14, 2009

Christmas decorating

My friend Sherilyn was out last month and we went to the local Art Knapp for their Christmas Extravaganza... without children! It was so great to take our time looking around without worrying that some little set of hands would touch something they weren't supposed to. I found these fabulous cast iron urns for $25 each! What a steal. Normally they're $125, I think. Crazy. So, I decided to decorate them up for Christmas. I went to my parent's land and got my dad to help me find some cedar and some big pine cones. I then went back to Art Knapp and bought some orange twisted willow (so pretty!) and another kind of greenery for a grand total of $15. I then grabbed some leftover red plastic balls I had in my decorating stash and voila! Some very festive, chic (and cheap!) decorations for my front step.My husband was also being creative the other day while we were out at my parent's tree farm helping sell Christmas trees. My mom had started a wreath by cutting out a cardboard circle, and then cutting out another circle inside of it. She then wrapped string around the cardboard, fairly close together, and then tied it off at the end. Jeremy then added the greenery, tucking the ends under the string, which catches on the needles, holding the branches in place. I added a red bow that I had in my stash and hung it on our front door. My hubby's so crafty and he doesn't even realize it! I am super pleased with the result, and think I'll have to make some pine swags to match, and hang them on either side of our carport.