Showing posts with label recipe. Show all posts

October 29, 2012

SUPER EASY Fall Baking Fun

We've had some fun trying new baking ideas this fall.  When I was a kid I remember thinking it was such a special treat when my mom would make cupcake cones!  So I decided to give it a try with the kids... but not just any cupcake cones... RAINBOW cones!

I have to say, this is super EASY, and has a great end result.  We mixed up a white cake mix, divided it into six ziploc bags, and then used food coloring to make the batter yellow, green, red, purple, blue and orange.  I sealed the bags and then the kids mushed up the batter until the color was evenly worked throughout the batter.  Then I snipped the corner of the bag and squirted the batter into each of the cones, layering the colors, one at a time.
 Then we baked the cones in the oven at 350 for 18-20 minutes.  
Here's what they looked like inside:
 And we iced them, of course, just with a buttercream icing.  
Super yummy, and super easy!
We also made my absolute favorite  
PUMPKIN CHOCOLATE CHIP COOKIES!!!!  
I like to tell myself they're healthy because they have lots of pumpkin in them, and I've added whole wheat flour to the recipe and reduced the sugar from the original recipe.  They are light and moist and again, super easy!

3/4 c sugar
1 c canned pumpkin
1/2 c margarine
1 c white flour
1 c whole wheat flour
1 tsp baking powder
1 tsp baking soda
1 tsp cinnamon
1/4 tsp salt
1/2 c chocolate chips

I always double this recipe.  Bake at 350 for 10-12 minutes.


Our third attempt at baking fun was making these super beautiful fall leaf cookies that I found on Pinterest.  
We made a nice sugar cookie dough (super easy), and then divided it into three. One ball we colored red, one yellow and one orange.  
Then we rolled them together with the rolling pin and cut out the cookies with a leaf cookie cutter.  The colors will meld together, but will remain distinct.  The coolest thing about these cookies is that as you continue to roll the dough each time, the fronts and the backs or the cookies don't look the same.  
Each cookie is totally unique!
 After we finished baking these beauties we packaged them up and took them over to some of our new neighbors as a welcome to the neighborhood gift.  These cookies turned out so pretty, we didn't even have to ice them!  
Super easy!
The kids were thrilled to do something kind for our neighbors, and it was a great reason to meet them again (especially since I'm terrible with names, and needed a refresher on what to call them!)

August 12, 2011

When the Husband's Away, the Mom gets CREATIVE

My husband was away with work last week, so it was me ALONE with my children for three and a half days!  Yikes!  Not only that but it was HOT and we were all a tad bit grumpy... to say the least.
So, I put my thinking cap on to come up with some outdoor activities (inspired by one of my most FAVORITE blogs, Frugal Family Fun Blog) that involved WATER (because my kids decided they were tired of their pool - in 30 degree weather - whatever!) and SHADE to help fill our days and chase the grumpies away!
So, I mixed up a bunch of water in different containers with different food colouring in each container.  Dug out some old infant medicine droppers that I had kept, and away the kids went!  They MIXED and BLENDED and EXPERIMENTED with colours to their hearts content.  And the CLEAN-UP (once the colours had all been mixed to make a lovely murky black-brown colour?) involved dumping the water over the side of the deck onto the grass below!
 

 After the novelty had worn off from mixing colours, onto the next activity!  While the kids were busy, I quickly looked up instructions for folding paper boats, made some sails with toothpicks and construction paper and down to the pool we went for some SAILING races!


 YES!  It even enticed them into the water!
 Next was supper.  Aria wanted spaghetti, and I remembered something that I saw on Pinterest.  
Source: http://25.media.tumblr.com/tumblr_lao5cpVVlY1qbc1rpo1_500.jpgHotdog Spaghetti via Carmen on Pinterest
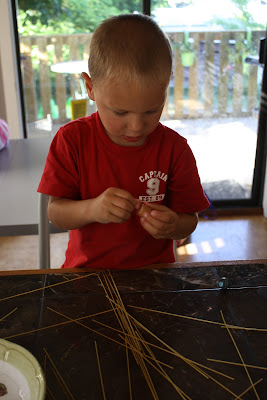
I thought it looked disgusting, but I knew the kids would LOVE it, and they would be able to help make it.  All that's required for this child-pleasing recipe is dry spaghetti and hotdogs.
 Simply poke the noodles through the chopped up, uncooked hotdogs (be careful, the noodles do break quite easily).

 BEFORE: kind of looks like porcupines...


 AFTER: looks more like a limp spider or jellyfish!
Needless to say, I made my own spaghetti (sans hotdogs) but the kids really enjoyed making their own supper, and thought it was great fun to eat!

August 4, 2011

You Say Tomato, I Say YUMMY!

It has been exciting days in my garden of late, as the tomatoes are starting to ripen up and turn RED.  
I have been snacking off the DELISHIOUSNESS that are my little cherry tomatoes, 
but this evening I harvested my first big tomato... and it was a MUTANT!  
But, I used it for my supper anyways and 
it. was. yum.
 
 My husband cannot eat tomatoes (his loss, my gain...) so tonight I enjoyed some Fasta Pasta a recipe taken from a Best of Bridge cookbook, I believe, where tomatoes are the STAR!

FASTA PASTA:
2 cups of halved cherry tomatoes (or any tomatoes, really)
1/2 cup of chopped fresh basil or 1/2 Tbsp dried (I enjoyed some lovely basil from my kitchen garden)
2 garlic cloves, minced
3 Tbsp olive oil
Salt and pepper to taste

Combine ingredients and let sit.

Make enough pasta for two (I used egg noodles tonight)
Add 1 cup of grated mozzarella cheese
Toss everything together, cover and set aside until cheese melts.
(I also added in some leftover roasted chicken from last night's supper)
D.I.V.I.N.E.

May 9, 2011

A Late Celebration of the Royal Wedding


As mentioned before, I was away at Orange Conference in Atlanta last week, and wasn't able to watch the wedding!  I wouldn't have been a die-hard like some out there, getting up at the crack of dawn to watch it live, but I would have liked to have sat down and watched a replay of it as a whole, rather than in the snippets that I was able to catch whenever we happened past a television.  Did you notice how it seemed to be on every single channel???  I was so encouraged to see the world stop and cheer on a marriage, in a time where divorce affects us all to some degree and it seems like the question we ask regarding the likelihood of a marriage lasting is not "if" but "when".  I know for my husband and I we have always said that "divorce" is not a word in our vocabulary.  It is not an option.  We made covenant promises to one another that I don't ever plan on breaking.  But, I digress...

So, on Monday, once I was safely home, we set up a tea party in the living room for Aria and Roscoe so that we could watch the Royal Wedding.  Aria made a fancy hat to wear.

Notice the glass slipper and jewelery taped to it?  And the big pink bow was a leftover from her birthday a couple weeks ago!

Roscoe lasted all of 10 minutes into the PVR recording of the wedding.

Here's something I wished I knew about before, so I could've made it for our tea party.  Prince William's favorite cake is a chocolate cookie cake.  Davison Orchards, a local attraction was offering it last weekend at their season opening, and they've kindly put the recipe on the their website.  I'm definitely going to have to try this recipe, especially if it is fit for a Royal Wedding!

April 21, 2011

Resurrection Rolls

These were super easy to make and very tasty!  I followed the directions, but the marshmallows didn't really "disappear" like I was hoping they would.  If I do them again, I might try increasing the oven temperature from 350 to 400.  Every recipe I read said to make sure to seal the dough around the marshmallows really well so that they would create a good pocket, but my marshmallows grew, and grew, and grew, and separated the dough.  Maybe its because I used the reduced fat croissants!  So much for trying to make healthy choices!
Ingredients
One that looks like it worked

One that kinda imploded

The empty tomb!


Playing Wii while the rolls were in the oven

His face doesn't say it, but he really liked them!

April 19, 2011

Family Connect April 17-23

I had the incredible privilege of storytelling this weekend at VAC Kids; a role that I always enjoy stepping in to.  This weekend was particularly special, as I got to share with the kids about Jesus trial and death... leaving the story hanging a bit, to build anticipation of what is to come next weekend!  It was a really neat weekend, and the power of the story was evident in the way all 125 kids tracked with me through out the weekend, because I just straight up told the story.  No bells, no whistles, no creative acting or costuming or lighting or props or computer graphics.  Just the simple story of God's incredible love for us and the lengths He will go to let us know that love and relationship first hand!

So, in light of what we learned about at VAC Kids this weekend, we have a recipe below to pique the mystery of Jesus' resurrection in the hearts of your kids.  I haven't yet tried this with my kids, but I'm super excited to.  For the past couple of years our family has made Resurrection Cookies (a merangue cookie that so sugary sweet even my kids won't eat them, and I end up eating them all because I feel guilty about wasting perfectly good food... yeah).  SOOOO, I was really excited to come across a recipe for Resurrection Rolls.  I know my kids will love it, because it has a marshmallow in it!  Enjoy!
 
Here is a recipe for a fun and intentional baking activity that explores the mystery of Jesus’ death and resurrection.  Take time discuss the symbolism of the different steps involved in the recipe.

Resurrection Rolls
You Will Need:
Crescent rolls (the Pillsbury kind)
Melted butter
Large marshmallows
Cinnamon
Sugar

Step 1: Preheat oven to 350 degrees. Give each child a triangle of crescent rolls. The crescent roll represents the cloth that Jesus was wrapped in.

Step 2: Take the white marshmallow. Jesus was pure and sinless like this marshmallow. Roll the marshmallow in butter and then in the cinnamon-sugar mixture. The butter represents the anointing oil and the cinnamon-sugar mixture represents the spices--both items were put on Jesus' body before they laid him in the tomb.

Step 3: Wrap the biscuit around the marshmallow and seal the dough around it. This part is very important--make sure the dough is completely sealed around the marshmallow. After they put Jesus in the tomb, they rolled a large stone in front of it to seal it.

Step 4: Roll the ball of dough in butter and then into the cinnamon-sugar mixture.

Step 5: Place on the cookie sheet. Tip: Wrap the dough around the marshmallow and pinch the dough together. Make sure that the side that you did the most "pinching" and "sealing" becomes the "bottom" of the tomb/roll. This will help keep the roll sealed. Otherwise, the roll will bake apart, exposing the marshmallow.

Step 6: Place the tray of rolls in oven for about 10-12 minutes or until done. Let the rolls cool and then serve.

Step 7: Encourage your child to break open the tomb to look for Jesus. Where is he? He has risen! The marshmallow melts and the crescent roll is puffed up, but empty.  How do the rolls taste? "Taste and see that the Lord is good..." Psalm 34:8  The rolls taste sweet, of course. Easter is a time to celebrate the sweetest gift of all--our salvation through Jesus. Although he was blameless, he died on the cross for our sins; was buried in a tomb from three days; then rose from the dead.

Read Matthew 28:1-10
At the tomb, Mary Magdalene and the other Mary saw an angel, who told them not to be afraid. No one had taken Jesus' body, but He Had risen from the dead! The angel told the women to go and tell the disciples what they had seen, that Jesus had risen from the dead. They were so excited that they ran all the way home to tell the disciples the good news! He is risen from the dead! Alleluia!
By rising from the dead, Jesus proved once and for all that He was the Messiah, the Savior of the World, the Chosen One, and the Lamb of God. By dying on the cross and rising from the dead, Jesus did what no other had ever done before. As both God and man, He overcame sin, death, and hell. And now because of what Jesus has done, these things no longer have any power over those who believe in Jesus and allow His Spirit to lead and direct them. 

Oh, and if you want to read an incredible blog about getting your kids to do an "Easter Hunt" for rocks, check out Impress Your Kids.  They have fabulous ideas, and are pretty much my new favorite blog.

April 20, 2010

Fancy Nancy Party Part 3 - Cake

So, we got a bit of a hot spell here on Friday... and thus, my fondant didn't perform as I intended it to.  I also couldn't find a butterfly cookie cutter, so I improvised with a heart shaped one that I used to create both wings.  The butterflies ended up larger than I intended, but no biggie.  Fondant and heat are not friends, so I didn't even attempt to do the butterflies on sticks, and instead used some ones that I found at the dollar store.  I think they look pretty neat.  Here's the sketch of my plan...
 And how it turned out in the end!


April 14, 2010

Fancy Nancy Party Part 1 - Marshmallow fondant

So, the countdown is on.. Aria's fourth birthday will be upon us in a matter of only 4 sleeps!  And the big party in only 3 sleeps!  Foolish me, I took both kids shopping with me today to pick up some groceries and some last minute items for the party.  I came home with a splitting headache that only went away after I got the kids in bed this evening.  But, I did accomplish my goal for the evening: to make up a batch of marshmallow fondant to decorate the cake.  I used this recipe last year on a Dora cake, and everyone loved the fondant-look, but enjoyed the taste of it so much more than a conventional fondant.  I must admit, I am inspired by such shows as "Ace of Cakes" and "Cake Boss".  So we're doing a much more grown-up looking cake this year, but one that will be exquisite (that's an even fancier word than beautiful) and posh (that's a fancy word for fancy)!  Oo la la!
(Aria's 3rd Birthday Cake... my first fondant attempt)

Marshmallow Fondant
1 package (400 g) of mini marshmallows
4 Tbsp water
1 tsp flavor - I used imitation coconut because I couldn't find a clear version of vanilla, and I like to use just white fondant and I thought that dark vanilla would make it kind of beige.
1 bag (1kg) of icing sugar
1/4 c crisco (works much better than butter for this)
1. Place crisco in a bowl to the side for easy access
2. Place marshmallows in a bowl and microwave on high for one minute to start melting.
3. Add water and flavor to hot marshmallows and stir.  Slowly beat in icing sugar, one cup at a time.  Keep one cup of sugar for kneading.  ***This is VERY sticky***
4. Rub hands and work surface liberally with crisco.  Knead "dough" until smooth and slightly less sticky, using reserved one cup of sugar to dust work surface and "dough".  ***I snickered at these directions I found, because as if marshmallows and icing sugar aren't ever going to be sticky!***
5. I added the color at this point, because I wanted to have several different colors.  I divided the dough into portions relative to the amount per color I thought I would need, and then mixed in the color.
6. Spread some crisco on a piece of plastic wrap.  Wrap plastic around the fondant, and then cut another piece of plastic, and double wrap the fondant.  This ensures that the fondant won't dry out.  Then, stick it in the fridge.  I've read that you can store the fondant this way up to two weeks.  That's planning REALLY far ahead in my mind, or maybe its a way to save leftovers for use on something else later.

When you go to use the fondant, grease up the work surface and your hands and rolling pin first.  Then use CORN STARCH to dust the surface.  It makes the whole rolling it out step WAY less frustrating.  I had a friend suggest rolling the fondant onto wax paper, so that you can just flip the rolled out fondant onto the cake and peel away the paper rather than carrying the fondant, and hoping it doesn't tear.  Use a little bit of water if your fondant does tear on the cake, for minor repairs.

I'll post pics of the cake later, after the party's done!  Enjoy!

April 2, 2010

Easter Plans

Okay, so I've got some Easter activities planned for Aria and I.  Last year, we started a couple traditions that I'd like to continue this year: decorating hard-boiled eggs (of course), and making resurrection cookies! 

EASTER EGGS
So, for the eggs... I just finished hard-boiling a dozen eggs (good thing we like egg-salad sandwiches, and deviled eggs - if I find the motivation to make them!).  I put them in a pot, covered them with water, stuck them uncovered on the stove, and brought them to a hard boil for one minute.  Then I removed them from the heat, covered them and let them sit for 18 minutes.  After the timer went off, I put them in the sink and ran cold water on them to cool them quickly.  Now I need to stick them in the fridge until we're ready to colour them.

My favorite and I think prettiest way to colour them is with food colouring, oil and vinegar.  Pour some 1 Tbsp vinegar in a bowl, add a splitch (is that a word?) of vegetable oil and a couple drops of food colouring.  Top up the bowls with water.  Make up a couple different colours in a few different bowls.  Then place an egg in a colour, roll it around with a spoon, remove the egg, dry it with a paper towel, and dip it in another colour....  You get this very pretty marbled effect.  The vinegar does the job of setting the colour so that after its dry it shouldn't rub off on your hands.

The other thing I'm going to do with my daughter tomorrow (Saturday) is make resurrection cookies.  This is a really cool way to walk your child through the events of Jesus' journey to the cross and the tomb, so that they can experience it with their senses, and have it explained at a level they can understand.  I struggle with knowing how much to say to my 4 year old about the how and why of Jesus' death and resurrection.  He died because he loves us, but she doesn't even really grasp what death is!  At preschool she's been learning the song "God's not dead", and it is so cool to hear her walking around the house singing "God's not dead, NO! He is alive!"  Yes, he is alive, and that is SO exciting!  He conquered death!  He's bigger than that!  And he chose to humble himself so that he could show me the incredible depth of his love for me.  I am so blessed.

Anyways... the cookie recipe is as follows...

RESURRECTION COOKIES
Read the whole recipe before beginning.  Try to do together Saturday night before Easter Sunday.

You need: wooden spoon, Bible, zipper baggie and tape

Ingredients:
1 cup whole pecans
3 egg whites
1 cup sugar
1 tsp vinegar
Pinch of salt

Preheat oven to 400 degrees.

Place pecans in zipper baggie and let children beat them with the wooden spoon to break into small pieces.
Explain that after Jesus was arrested He was beaten by the Roman soldiers. Read John 19:1-3.

Let each child smell the vinegar. Put 1 tsp. vinegar into mixing bowl.
Explain that when Jesus was thirsty on the cross he was given vinegar to drink. Read John 19:28-30.

Add egg whites to vinegar. Eggs represent life.
Explain that Jesus gave His life to give us life. Read John 10:10-11.

Sprinkle a little salt into each child's hand. Let them taste it and brush the rest into the bowl.
Explain that this represents the salty tears shed by Jesus' followers, and the bitterness of our own sin.
Read Luke 23:27.


So far the ingredients are not very appetizing.
Add 1 c. sugar.
Explain that the sweetest part of the story is that Jesus died because He loves us. He wants us to know this and how to belong to Him. Read Ps. 34:8 and John 3:16.

Beat with a mixer on high speed for 12 to 15 minutes until stiff peaks are formed.
Explain that the color white represents the purity in God's eyes of those whose sins have been cleansed by Jesus. Read Isaiah 1:18 and John 3:1-3.

Fold in broken nuts. Drop by teaspoons onto wax paper covered cookie sheet.
Explain that each mound represents the rocky tomb where Jesus' body was laid. Read Matt. 27:57-60.

Put the cookie sheet in the oven, close the door and turn the oven OFF.
Give each child a piece of tape and seal the oven door.
Explain that Jesus' tomb was sealed. Read Matt.27:65-66.

GO TO BED!
Explain that they may feel sad to leave the cookies in the oven overnight Jesus' followers were in despair when the tomb was sealed. Read John 16:20 and 22.

On Easter morning, open the oven and give everyone a cookie.

Notice the cracked surface and take a bite. The cookies are hollow! On the first Easter Jesus' followers were amazed to find the tomb open and empty! Read Matt. 28:1-9

HE HAS RISEN!  HALLELUJAH!